Starting a New Project
GLASS Studio offers several data type example projects that provide a solid framework around which you can build your own data type. But if you prefer to start fresh, you can start with a new (blank) project.
Creating a New Project
To create a GLASS data type from scratch, you can start in Visual Builder or Code Editor mode.
Creating a New Visual Builder Project
- Launch GLASS Studio and sign in using your Ground Labs
customer portal
credentials, or
click on GLASS Studio at the top left and select New to return to the start screen. -
In the start screen, select New Visual Builder Project +.

-
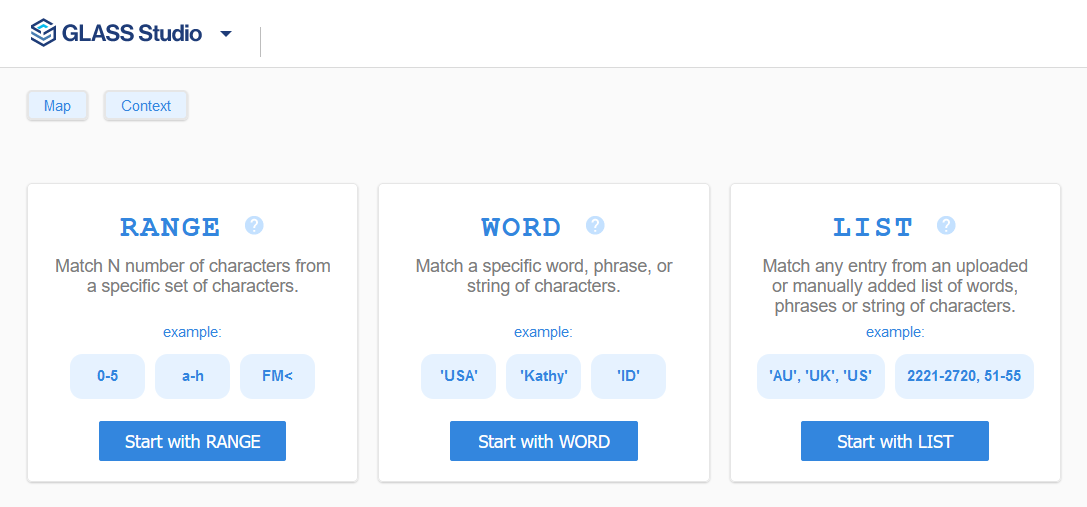
In the Visual Builder playground, add your first pattern to the project by selecting:
- Start with RANGE - Add a RANGE component to search for N number of characters from a specific set of characters.
- Start with WORD - Add a WORD component to match a specific word, phrase, or string of characters. or
- Start with LIST - Add a GROUP component to search for any entry from an uploaded or manually added list of words, phrases or string of characters.

-
Define the search pattern, options, and patterns rules for the selected RANGE, WORD, or LIST component.
- In Visual Builder mode, continue adding components to the data type project.
Once your data type definition is complete and you have tested the GLASS pattern, you can then use the custom GLASS pattern in Enterprise Recon.
Creating a New Code Editor Project
- Launch GLASS Studio and sign in using your Ground Labs
customer portal
credentials, or
click on GLASS Studio at the top left and select New to return to the start screen. -
In the start screen, select New Code Editor Project +.

- Define your GLASS pattern. See GLASS Reference for detailed information on all GLASS operators and/or keywords.
- Compile the GLASS pattern to ensure that the code is free from syntax errors.
Once your data type definition is complete and you have tested the GLASS pattern, you can then use the custom GLASS pattern in Enterprise Recon.
See Code Editor for more information.
Using the GLASS Code in Enterprise Recon
- Once the data type definition is complete, click the
Copy to clipboard
 button to copy the (generated) GLASS code.
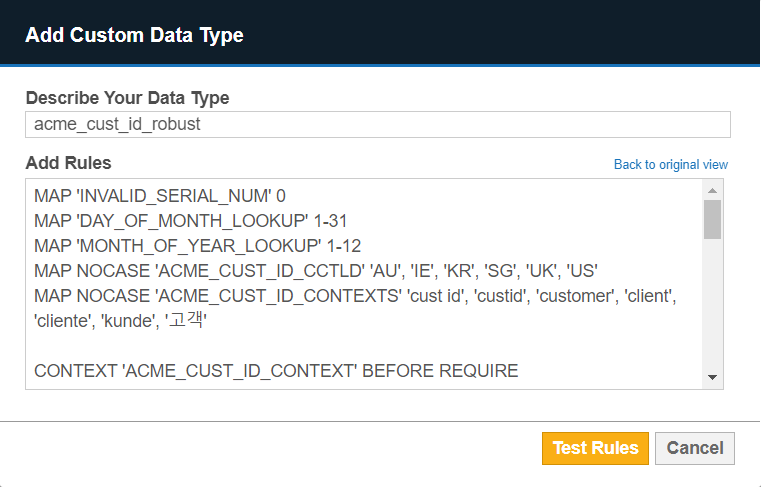
 - Go to your Enterprise Recon Master Server instance and create a custom data type for a data type profile (e.g. "ACME Corporation DTP").
- Click on View rules as expression to switch to the Expression Editor.
- Enter a descriptive label for the custom data type (e.g. "acme_cust_id_robust") in the Describe Your Data Type field.
- Paste the copied GLASS code into the Add Rules
field and click Test Rules.

- If the GLASS code can be parsed successfully, click Confirm and proceed to save the data type profile.
You can now search for sensitive data that matches your custom data type when you select the newly edited data type profile (e.g. "ACME Corporation DTP").
See Building and Defining GLASS Patterns to learn more about using the GLASS Studio components to build your GLASS data type.
Saving a Project
Once a project is created, or when any changes are made, you will want to save it.
- In the toolbar, click on GLASS Studio at the top left and select Save.
- In the Save Pattern dialog box, give the project a name (e.g. "acme-data-type-v1"), and click on Save. The GLASS Studio data type project file will be appended with ".glass" and stored as a single JSON-formatted file (e.g. "acme-data-type-v1.glass.json").
- Choose the folder in which to save the data type project file and click Save.