Data Type to Search for Company Email Addresses
![]() WORD,
NOCASE, RANGE,
TIMES, BOUND
WORD,
NOCASE, RANGE,
TIMES, BOUND
Overview
Imagine you are tasked to use GLASS Studio to create a custom
GLASS data type that will match (case-insensitively)
company email addresses with the format <mailbox>@example.com.
In this tutorial, you will go through the steps to build and test the company email address data type in Visual Builder mode. The resulting GLASS expression can then be deployed as a Custom Data Type in Enterprise Recon.
Prerequisites
This tutorial assumes that you have:
-
A valid set of Ground Labs customer portal credentials to log in to GLASS Studio.
Note: Please Submit A Ticket if you require assistance regarding access to GLASS Studio. - Working knowledge of Enterprise Recon.
- A reasonable understanding of what a data type is.
Data Type Requirements
We will also make the following assumptions regarding the data type, along with the structure and format of company email addresses.
- The data type should match company email addresses (
<mailbox>@example.com) case-insensitively. - The length of a mailbox name is between 2 to 64 characters.
- Valid email addresses may contain a combination of ASCII alphabets and
numbers (
0-9a-zA-Z) in the mailbox name but the first character must be an alphabet (a-zA-Z). - Email addresses should be bounded only by non-alphanumeric characters
(
^0-9a-zA-Z). - Some examples of company email addresses that we expect to match:
employee1@example.comsupport@example.comjdoe@example.com

Part 1 - First Character of the Mailbox Name
You will start by defining the GLASS expression that requires the first character of the mailbox name to be a letter.
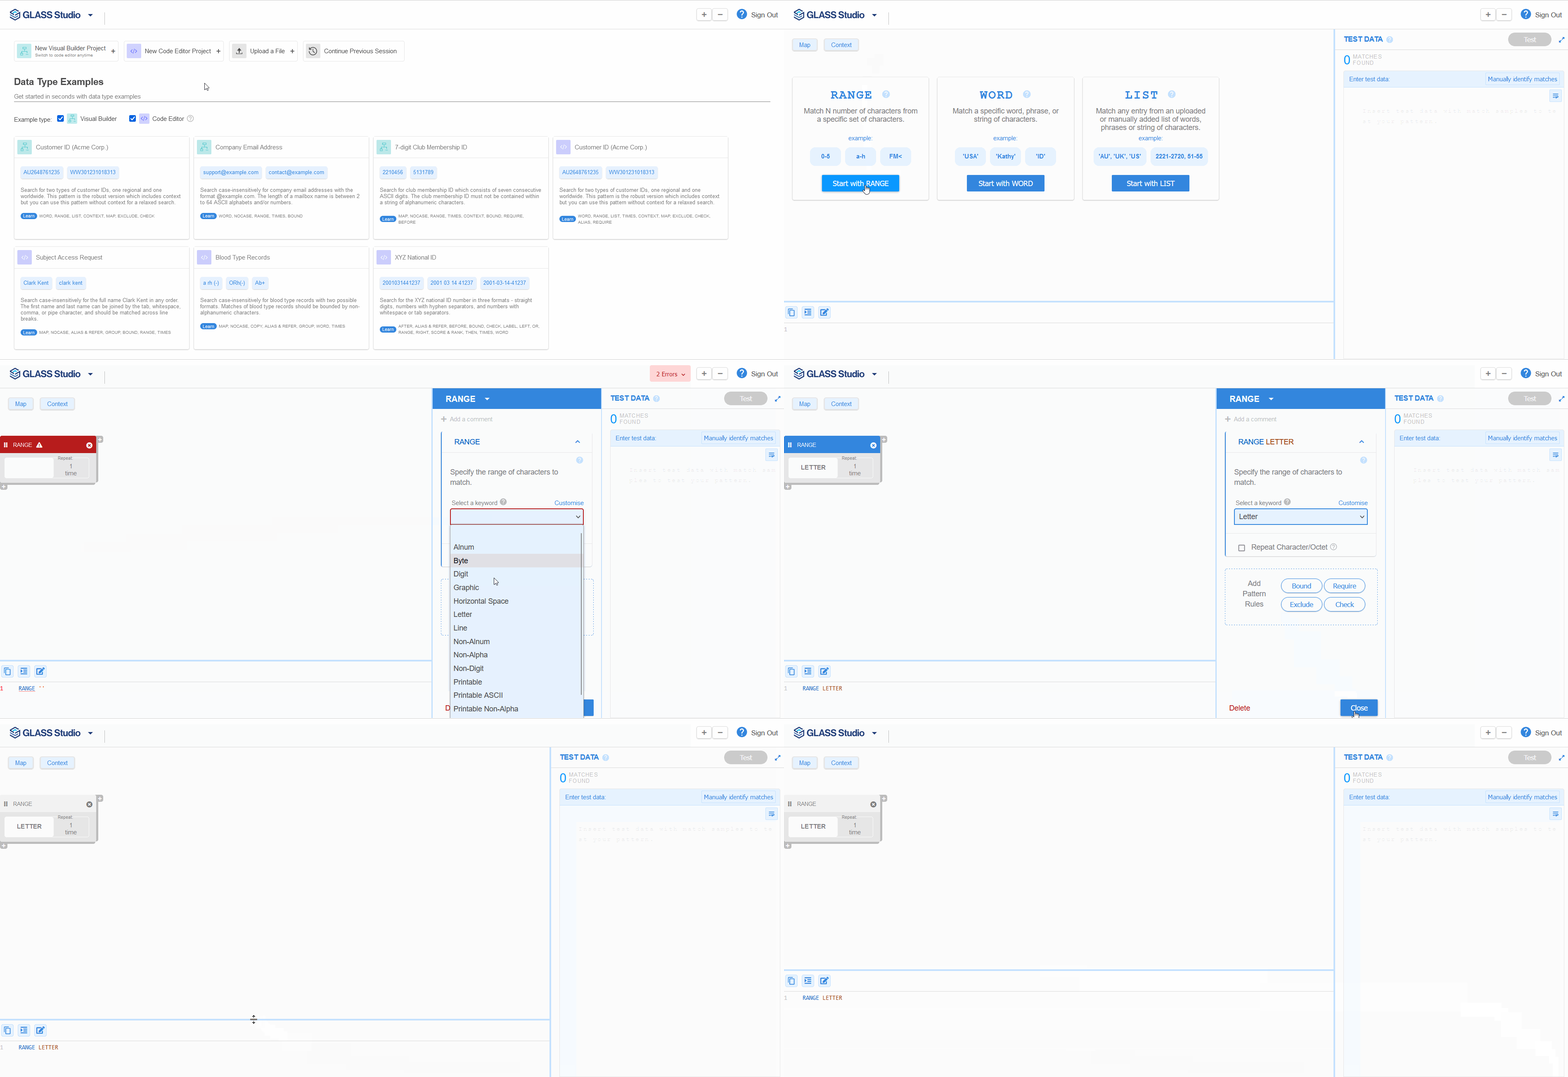
- Launch GLASS Studio.
- In the start screen, select New Visual Builder Project +.
- Select Start with RANGE.
- In the Select a keyword dropdown, select Letter.
- Click Close.
Part 2 - Rest of the Mailbox Name
Next, you will build the rest of the mailbox name which (including the first letter) should be 2-64 characters long.
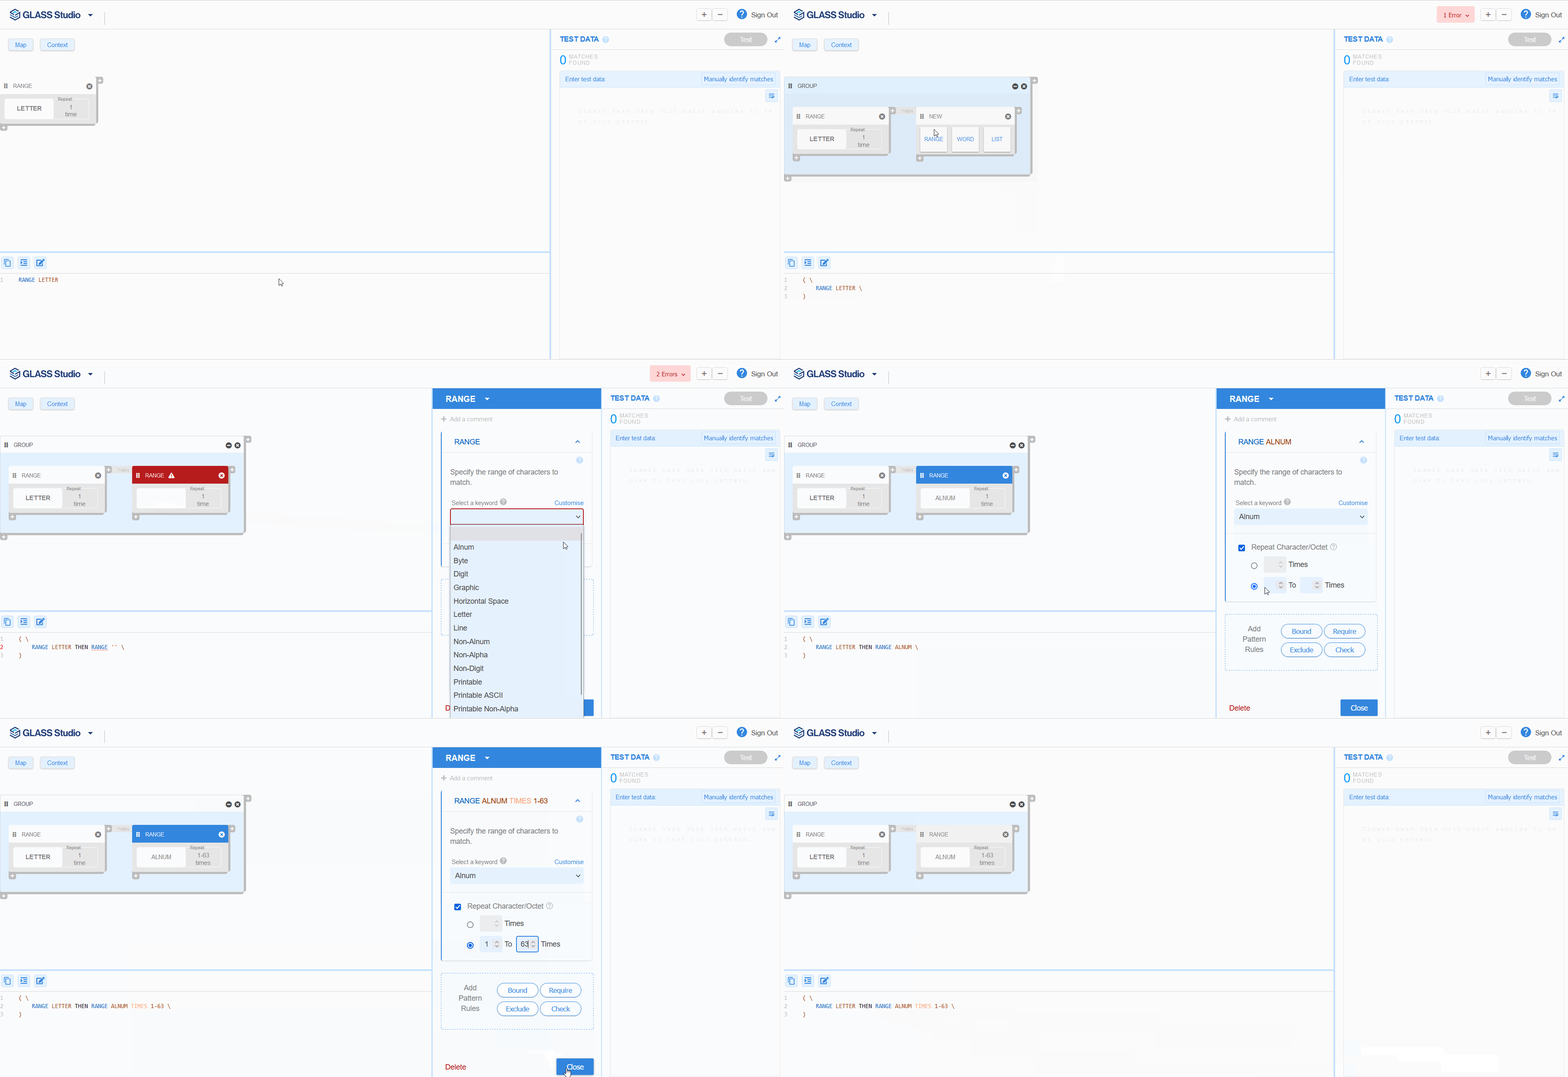
- Hover over and click on the + button at the top right corner of the first RANGE component.
- Select RANGE.
- In the Select a keyword dropdown, select Alnum.
- Check the Repeat Character/Octet option.
- Select the second radio button and key in 1 and 63 in the To and Times field respectively.
- Click Close.
Part 3 - Email Domain
In Part 3, you will add the third component that defines the email domain.
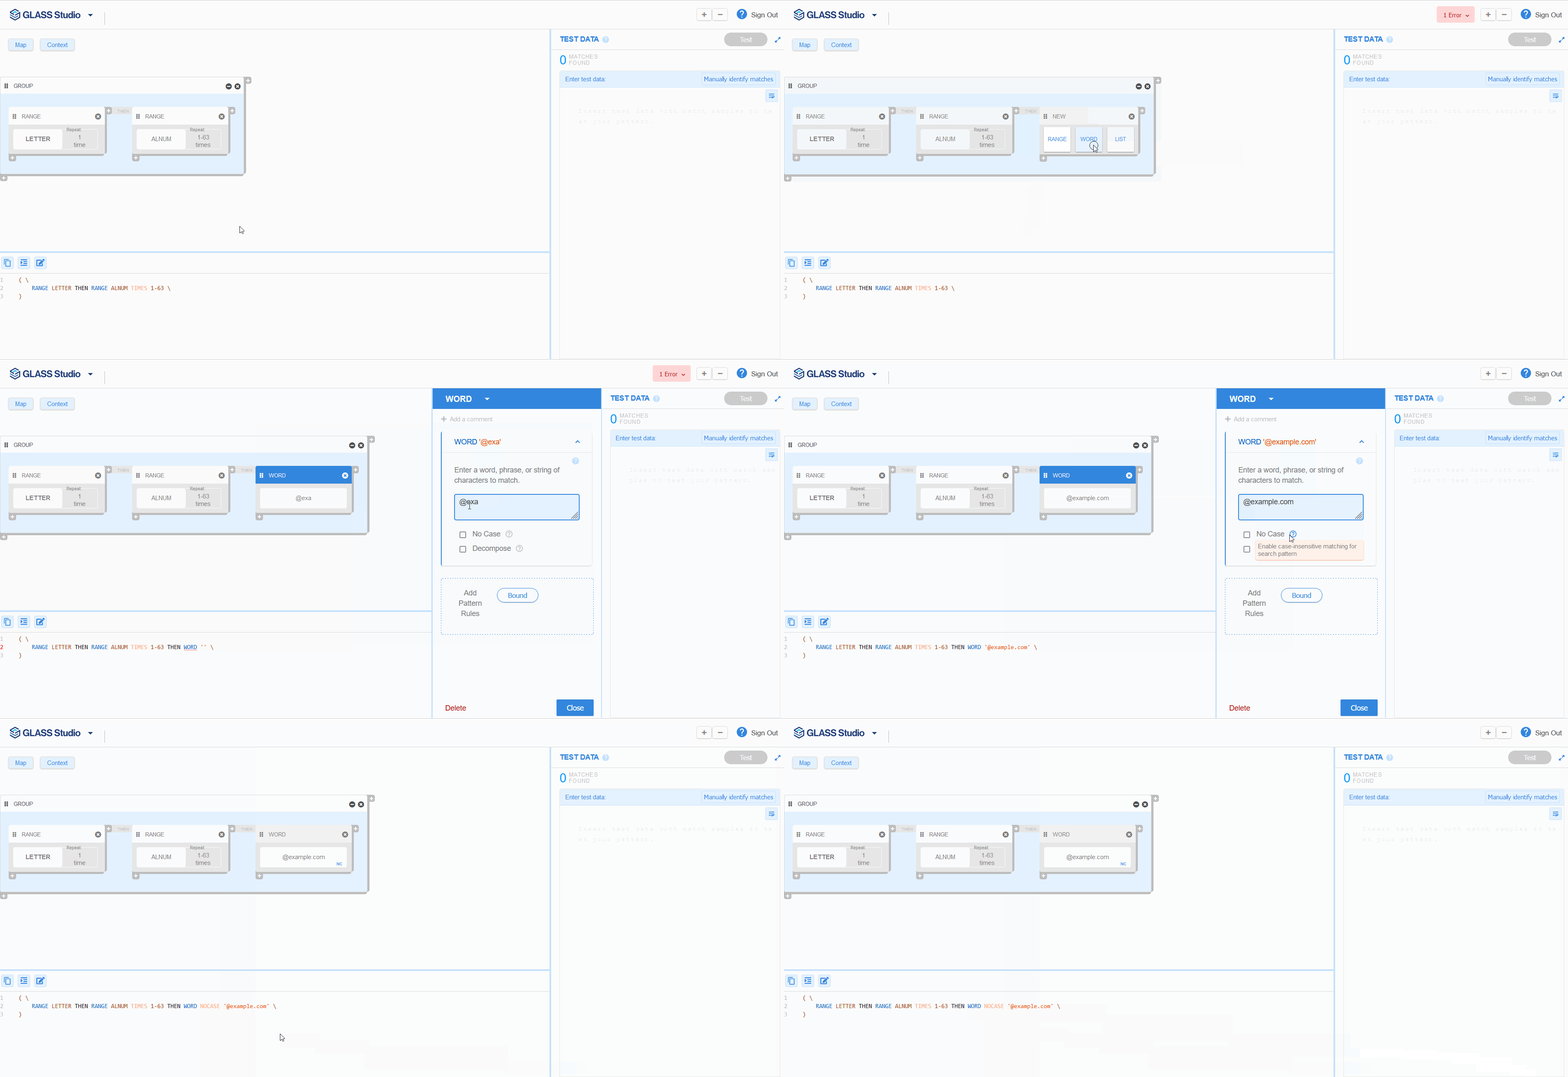
- Hover over and click on the + button at the top right corner of the second RANGE component.
- Select WORD.
- In the text field, key in @example.com.
- Check the No Case option.
- Click Close.
Part 4 - Boundary Rules
In Part 4, you will be adding boundary rules for the whole expression.
Using the BOUND operator, you can reduce the number of potential false positive matches by only reporting email address matches if they are surrounded by non-alphanumeric characters.
- Left click anywhere in the GROUP component.
- In the group form, click on Bound.
- For the Left option, in the Select a keyword dropdown, select Non-Alnum.
- For the Right option, in the Select a keyword dropdown, select Non-Alnum.
- Click Close.
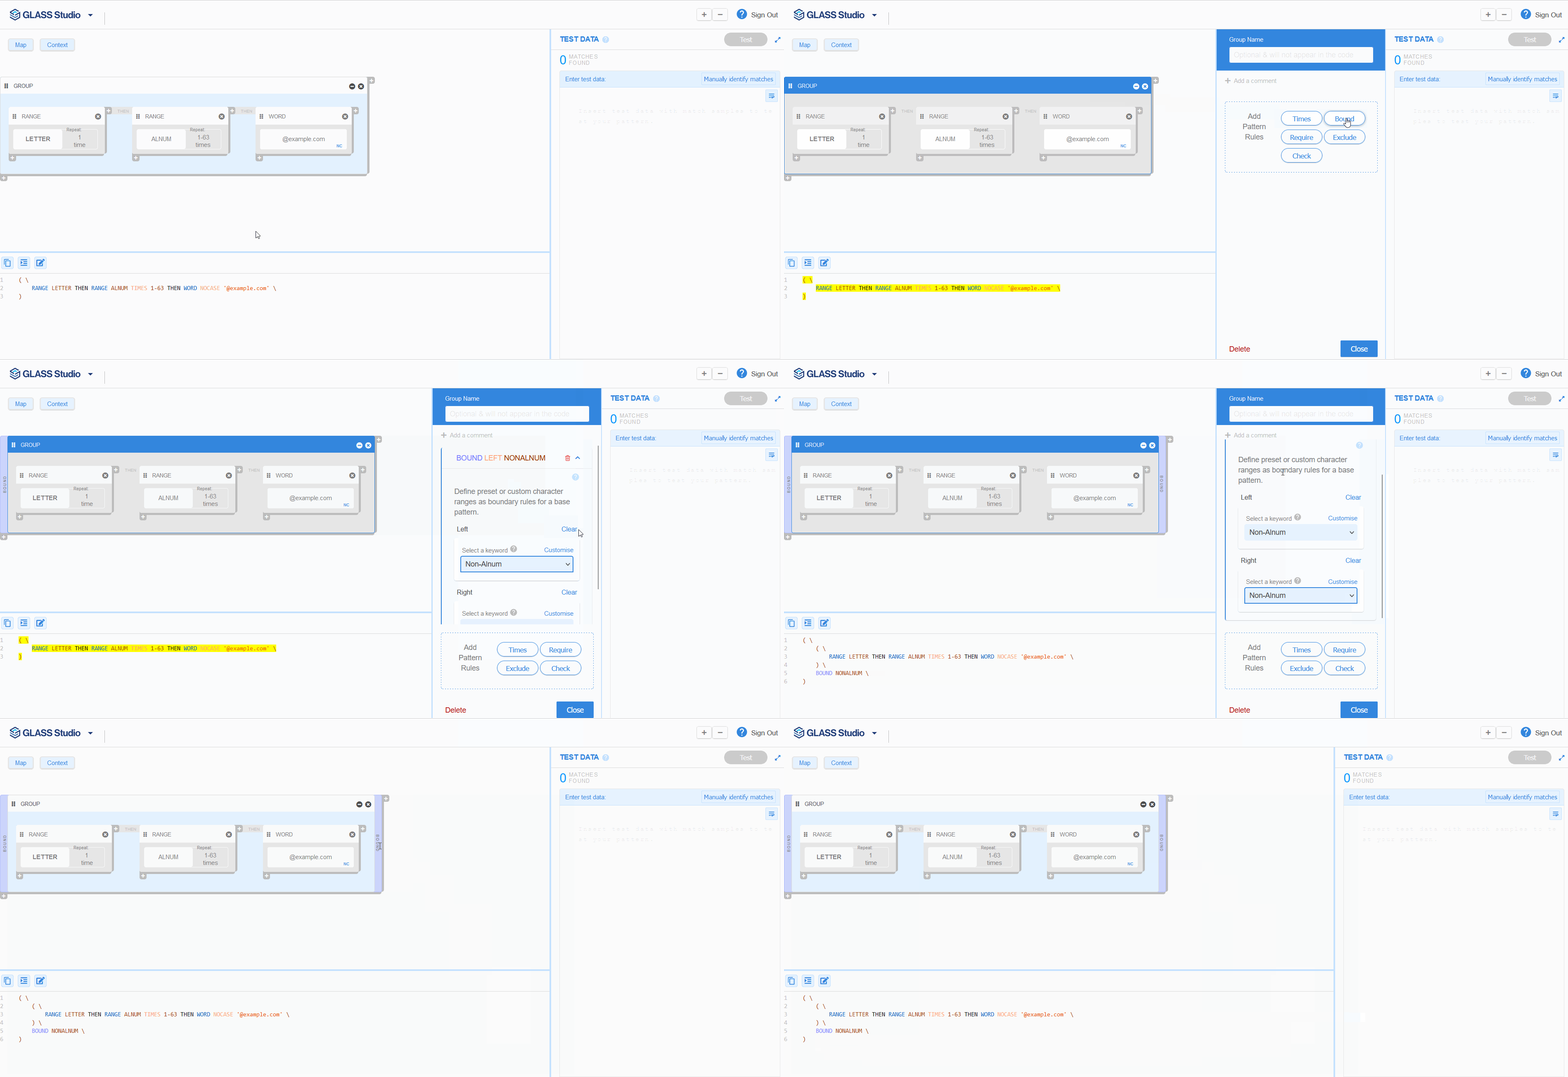
Congratulations! You have now fulfilled all the data type requirements and
built a working data type that will match email addresses with the domain
@example.com.
Part 5 - Testing the Data Type
|
1 2 3 |
Employee1,employee1@example.com,Marketing Customer Support: support@example.com 123@example.com |
- Copy the sample data provided above and paste it in the Enter test data: pane.
- Click Test.
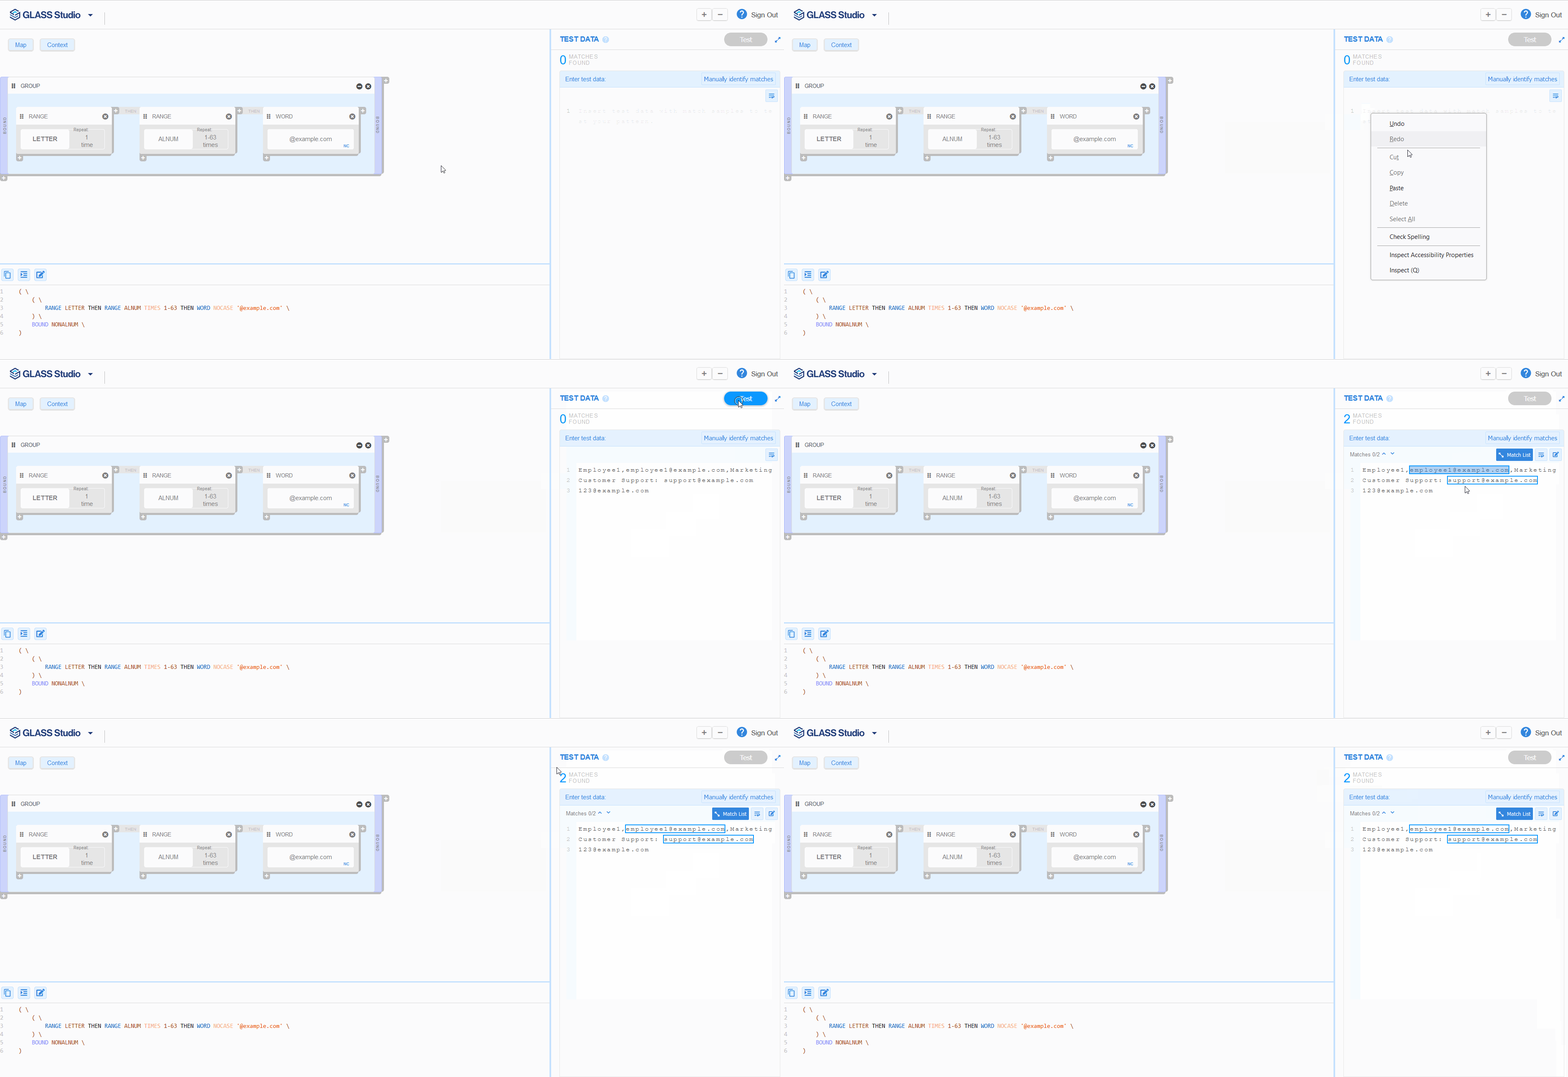
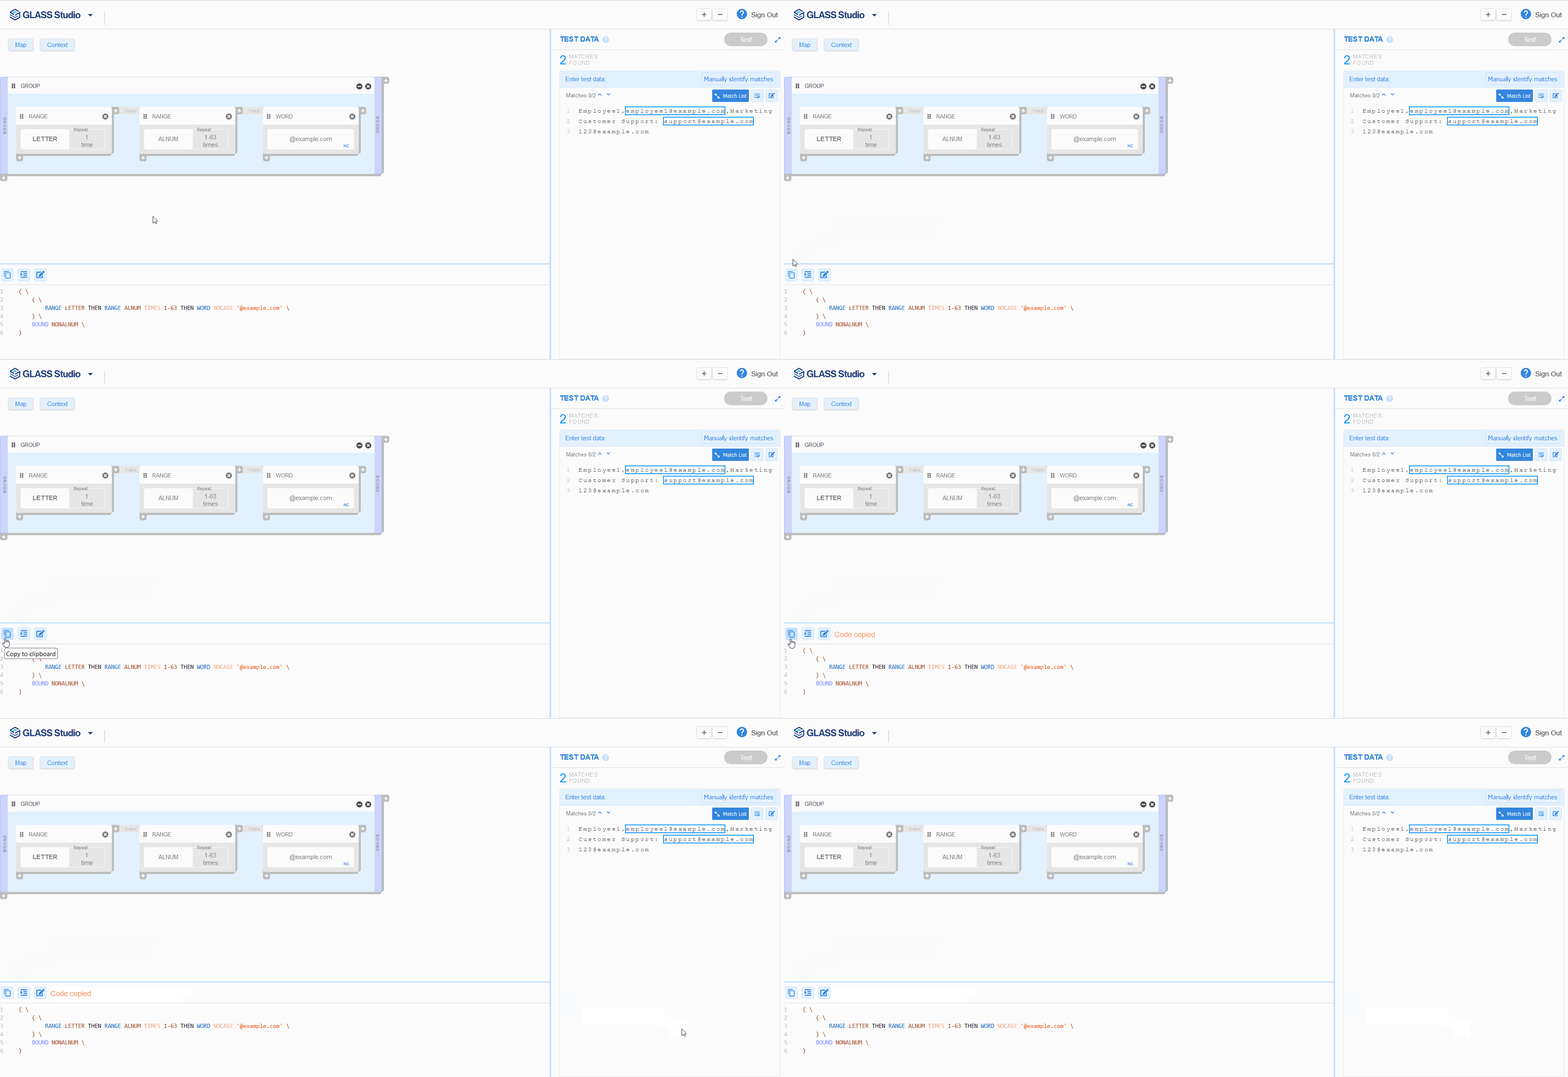
You should expect to see the results indicating 2 MATCHES FOUND for the
emails employee1@example.com and support@example.com.
123@example.com will not be reported as a match since the first character in
the mailbox name is a number when a letter is expected.
Part 6 - Using the Custom Pattern in Enterprise Recon
Now that you have tested the data type, click on the
Copy to clipboard
 button to copy the (generated) GLASS code, which can now
be deployed as a Custom Data Type in
Enterprise Recon.
