Testing GLASS Patterns
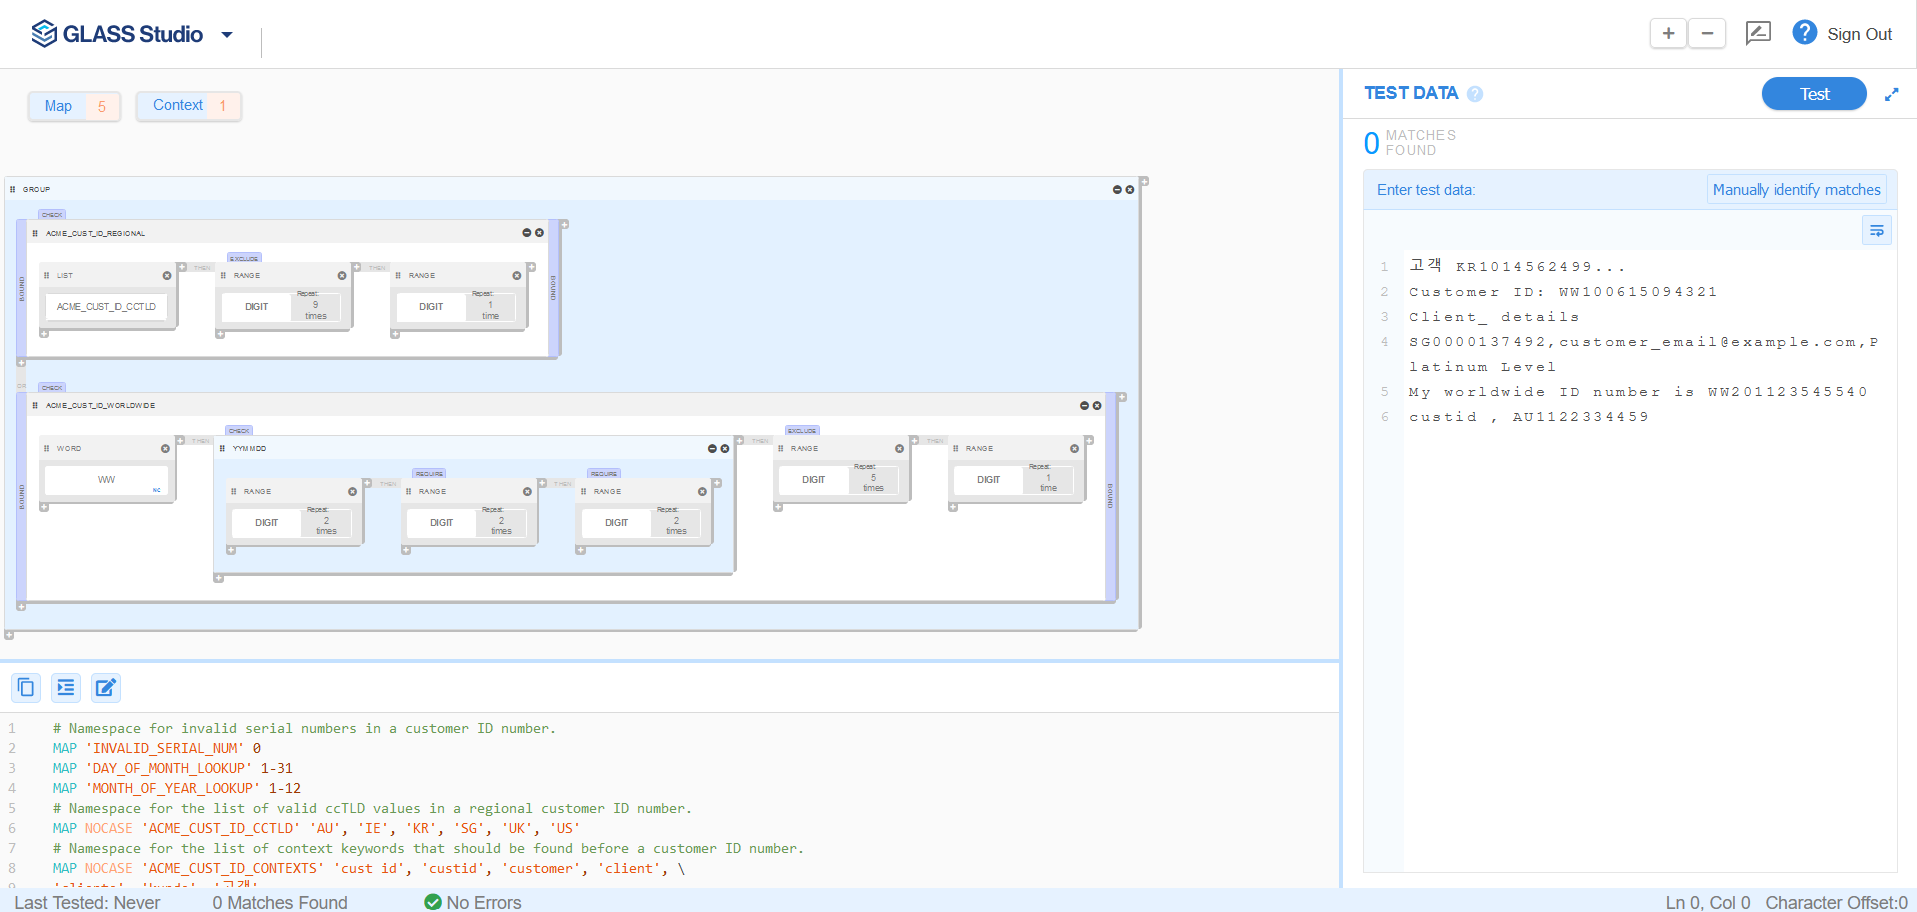
Once you have a sufficiently well-defined GLASS pattern, you can use the built-in Test Data feature in GLASS Studio to validate your custom data type.
Adding or Editing Test Data
To add test data:
- Open a new or existing GLASS Studio project.
-
Start typing or paste your test data in the Enter test data pane.
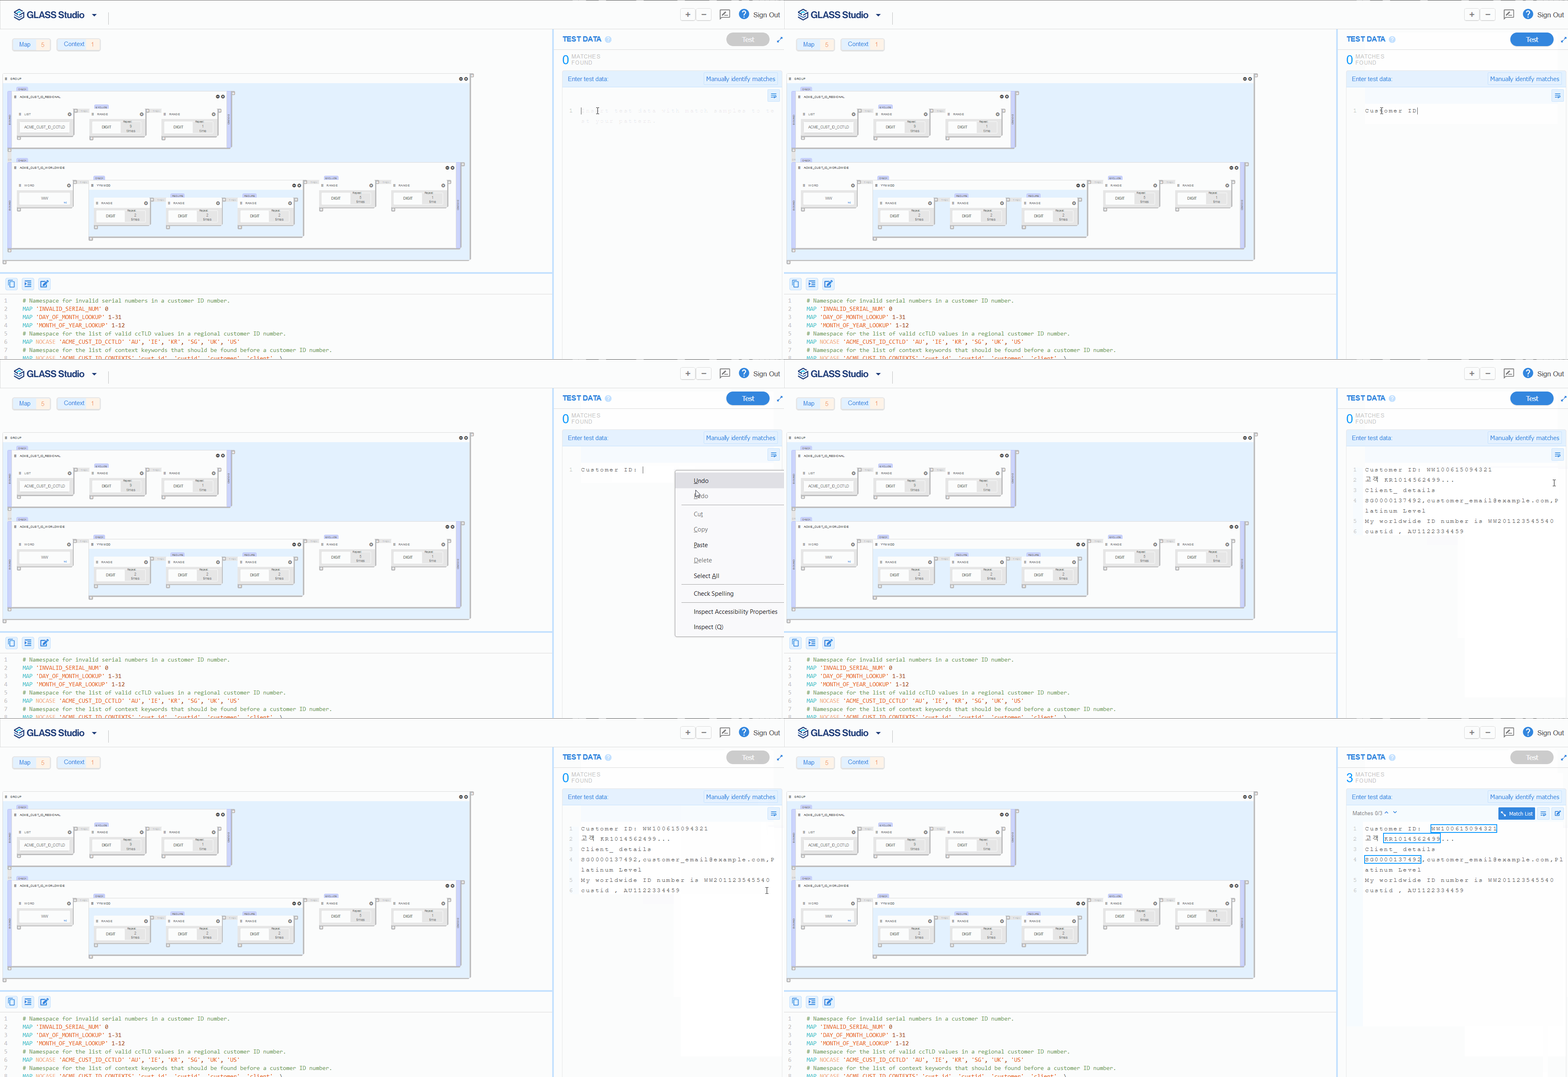 Note: You can input up to 50,000 characters in the Enter test data pane.
 - Click Test to run the GLASS data type on the provided test data, or click Manually identify matches to highlight the expected matches.
To edit test data:
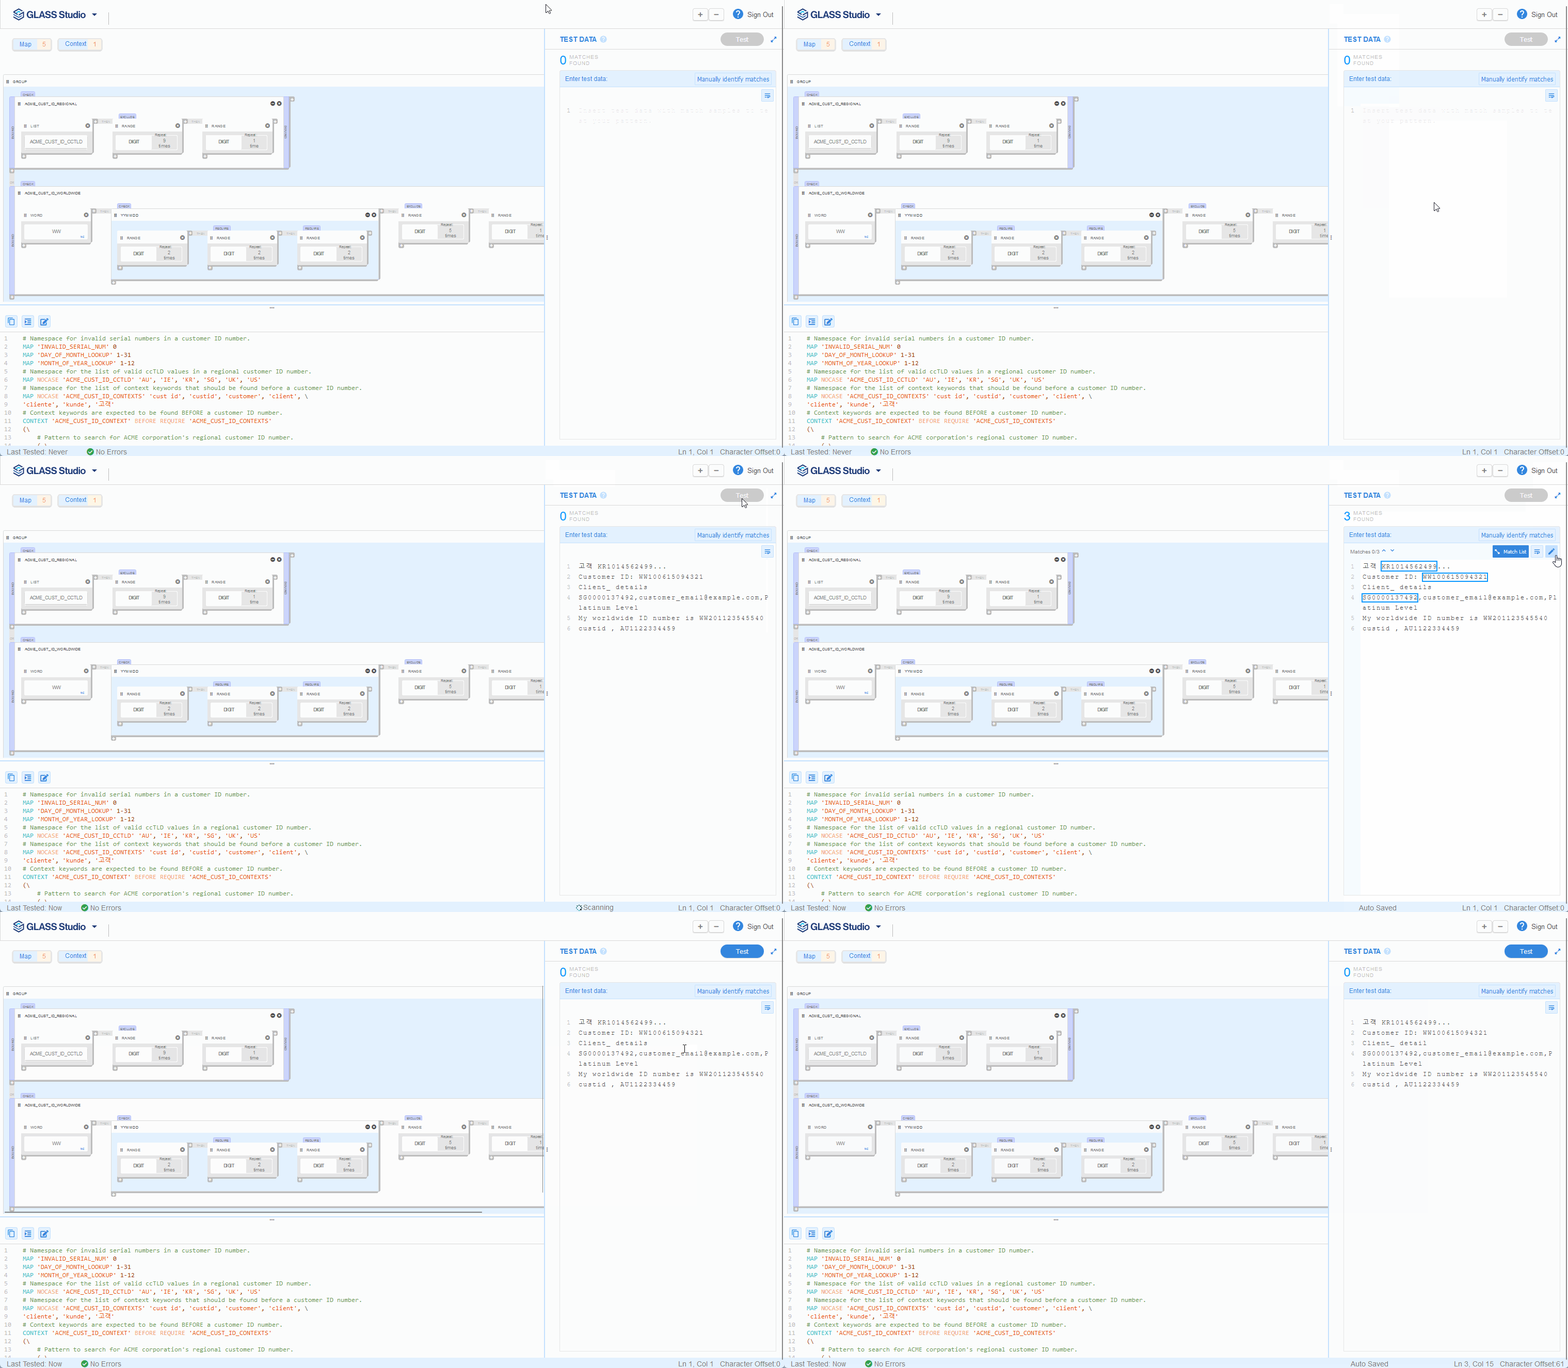
- In the Enter test data pane, click on the edit
 button.
-
In the Edit test data dialog box, click Ok to proceed.
Warning: Editing existing test data will lead to loss of existing match selection and match results. - Edit or update your test data.
- Click Test to run the GLASS data type on the provided test data, or click Manually identify matches to highlight the expected matches.
See Understanding Test Data Results for more information.
Understanding Test Data Results
When the Test button is clicked, the GLASS pattern that is defined in the GLASS Studio Visual Builder or Code Editor will be executed on the sample data in the Enter test data pane.
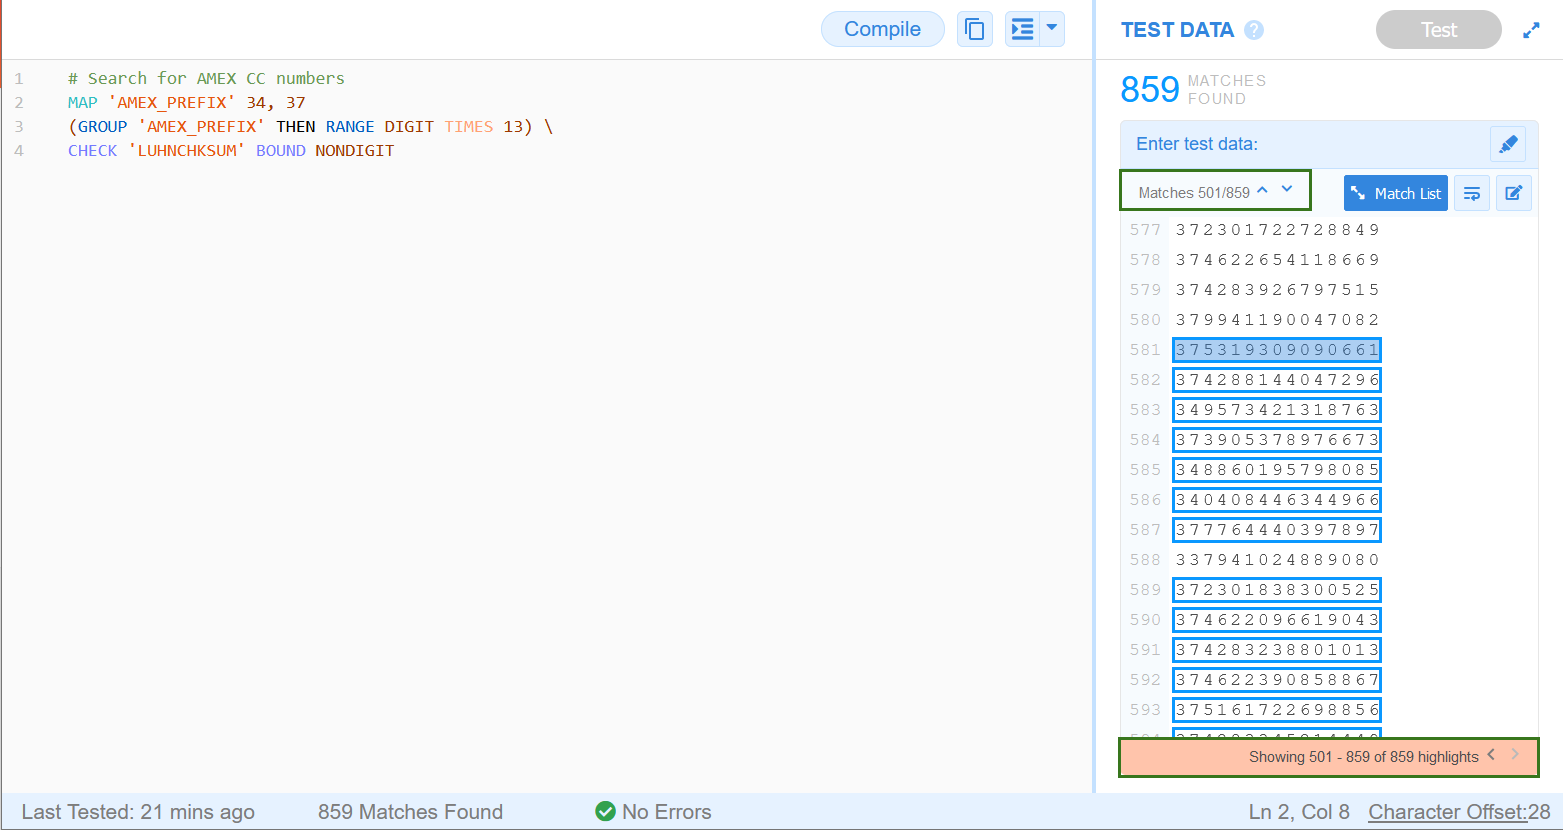
Testing Without Manually Identifying Matches
If the button is clicked without manually identifying any expected matches, matches that are found in the input test data set will be highlighted with a blue border (e.g., <matched data>).
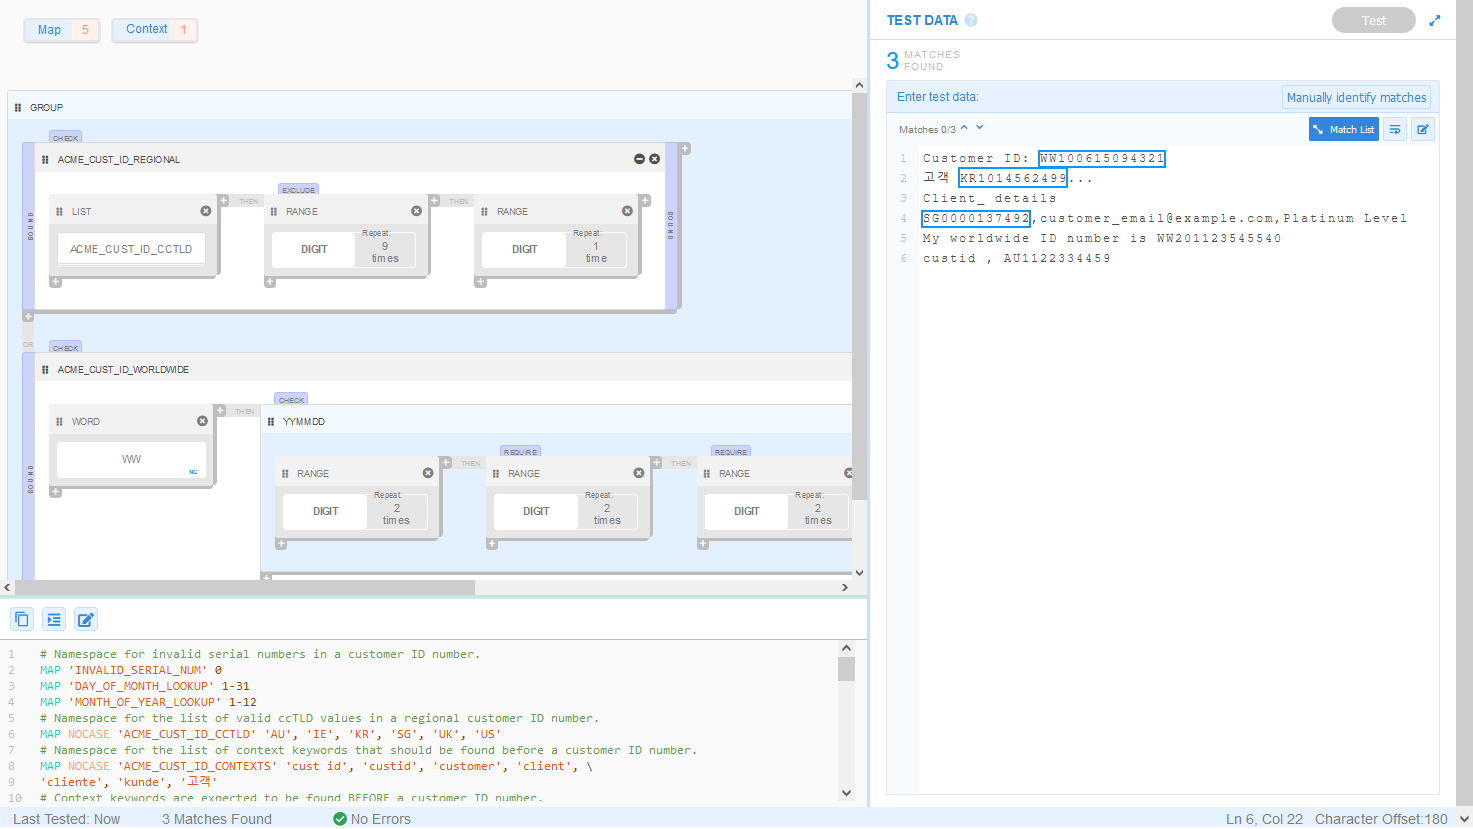
Testing After Manually Identifying Matches
If the button is clicked after using the Manually identify matches feature, matches that are found or not found in the input test data set will returned as follows:
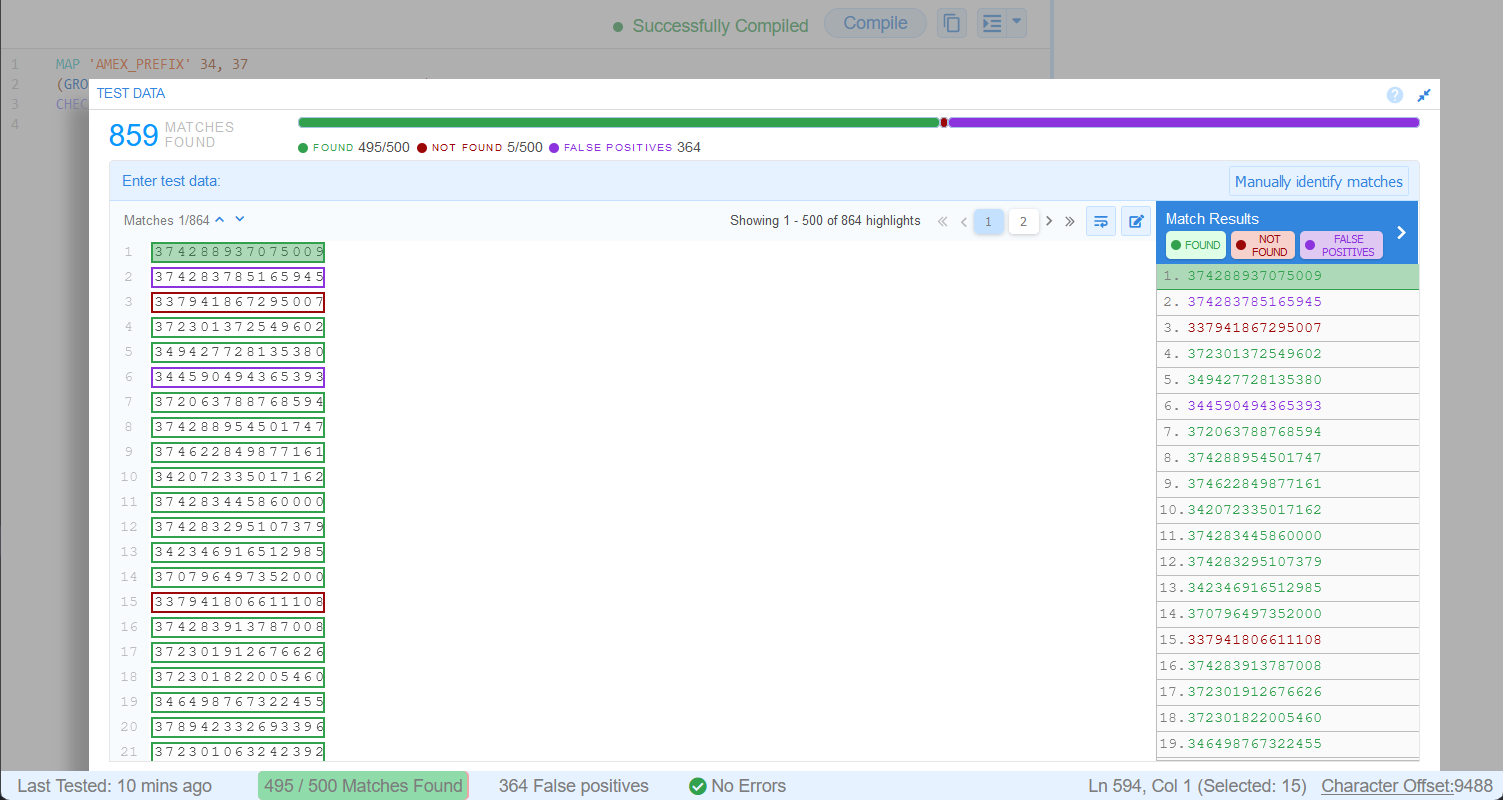
- Expected Matches - Matches that were manually highlighted / identified and found in the input data set will be highlighted with a green border (e.g., <expected matches>).
- Expected Matches Not Found - Matches that were manually highlighted / identified but not found in the input data set will be highlighted with a maroon border (e.g., <expected matches not found>).
- False Positives - Matches that were not manually highlighted / identified but found as matches in the input data set will be highlighted with a purple border (e.g., <false positives>).
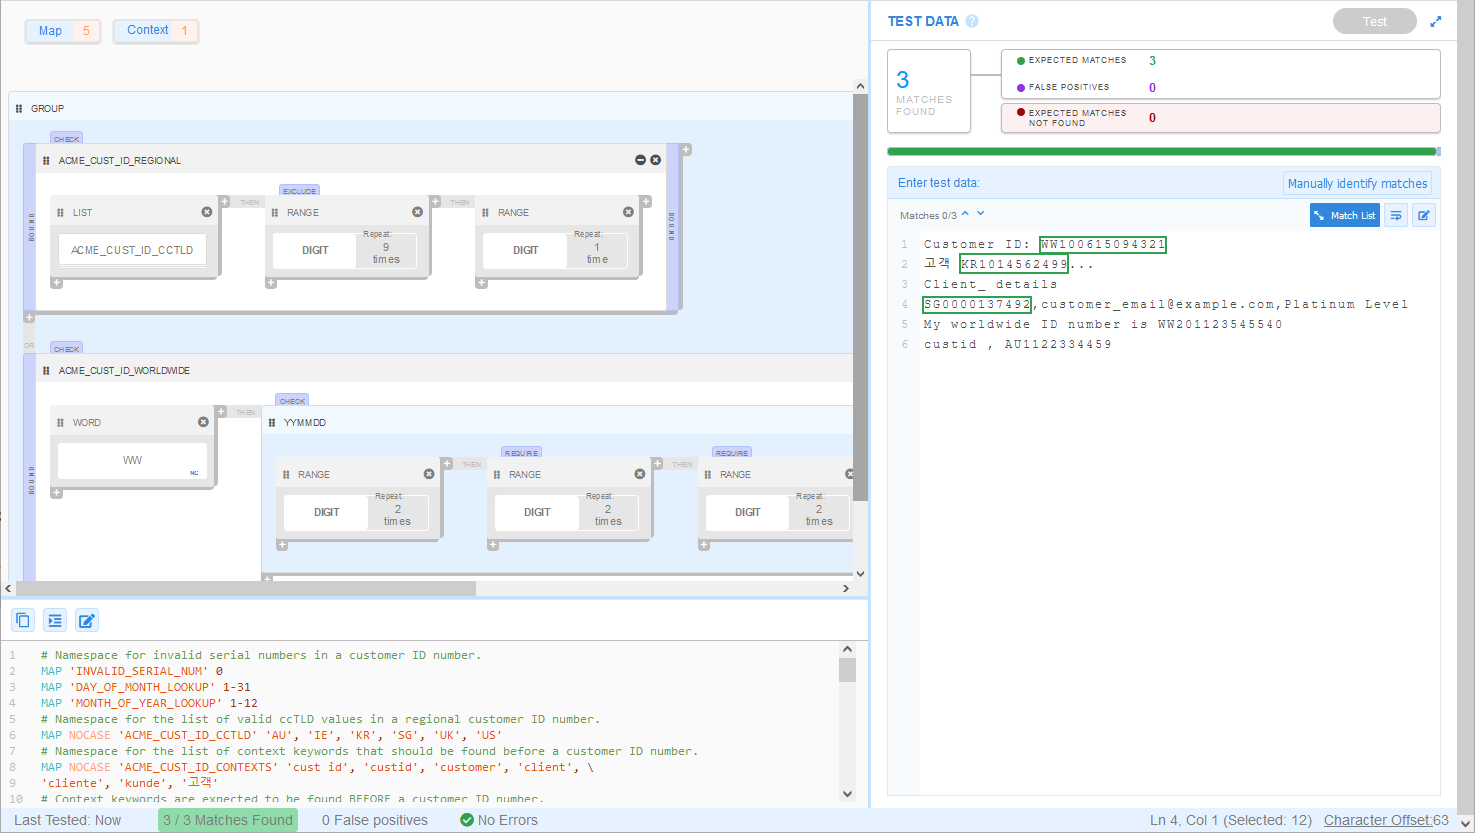
You can find a summary of the total number of Expected Matches, Expected Matches Not Found and False Positives in the TEST DATA pane and status bar.
Manually Identify Matches
To manually identify expected matches in the test data for the GLASS data type:
- In the Enter test data pane, click on Manually identify matches .
- (Optional) In the Valid Matches list on the right, select the checkboxes for valid expected matches. This is only required if the button was clicked before manually identifying any expected matches.
- Left click and drag to highlight the expected matches in the test data set.
Each highlighted match will be added to the Valid Matches list on the right.
The number of expected valid matches will be updated next to the Confirm
button.
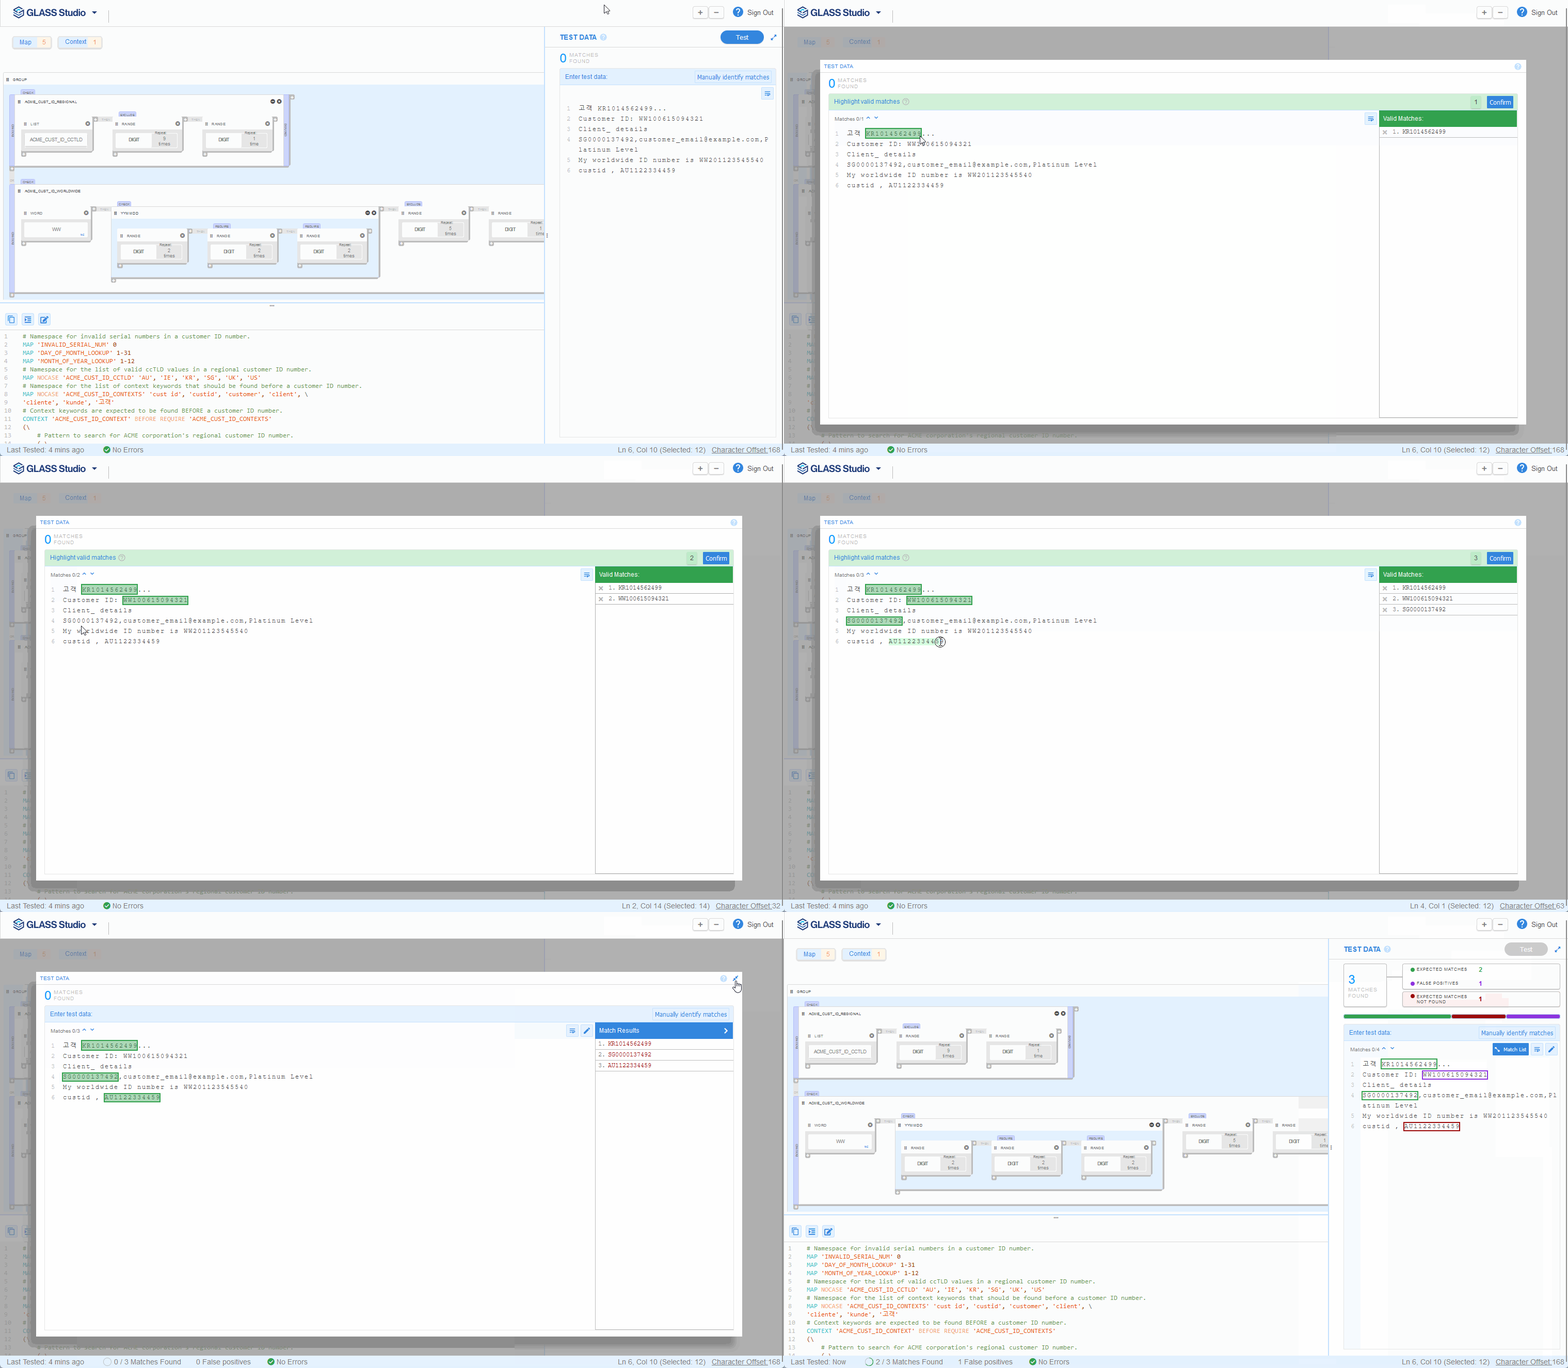
- (Optional) Click on next to a match in the Valid Matches list to remove a highlighted match.
- Once all the expected matches have been highlighted, click Confirm.
- Click on the arrow at the top right to return to the Visual Builder view.
- Click Test to run the GLASS data type on the provided test data. See Testing After Manually Identifying Matches for more information.
